Posts
My thoughts and ideas

Welcome to the blog
My thoughts and ideas
Introduction to bioinformatics for RNA sequence analysis
Choose one of two options to complete the hands-on exercises in this course:
You will first launch an EC2 instance from the course’s preconfigured Amazon Machine Image (AMI), then log in using SSH. For background on cloud computing and AWS terminology, see Introduction to AWS.
You will need an AWS account: your own, one provided by your institution, or an IAM user account assigned for a live course. The steps below use the live course account; the process is similar for personal or institutional accounts.
For live course participants: Wait until you are in the classroom and instructed to launch your instance. Running AWS instances costs money. Each student should launch their own instance.
Sign in to AWS using the URL and credentials provided by your instructors, or use your own AWS account.
For the 2026 CSHL Sequencing Technology course, use the following IAM account while the course is live:
cshl_student_2026
seqtec-2026
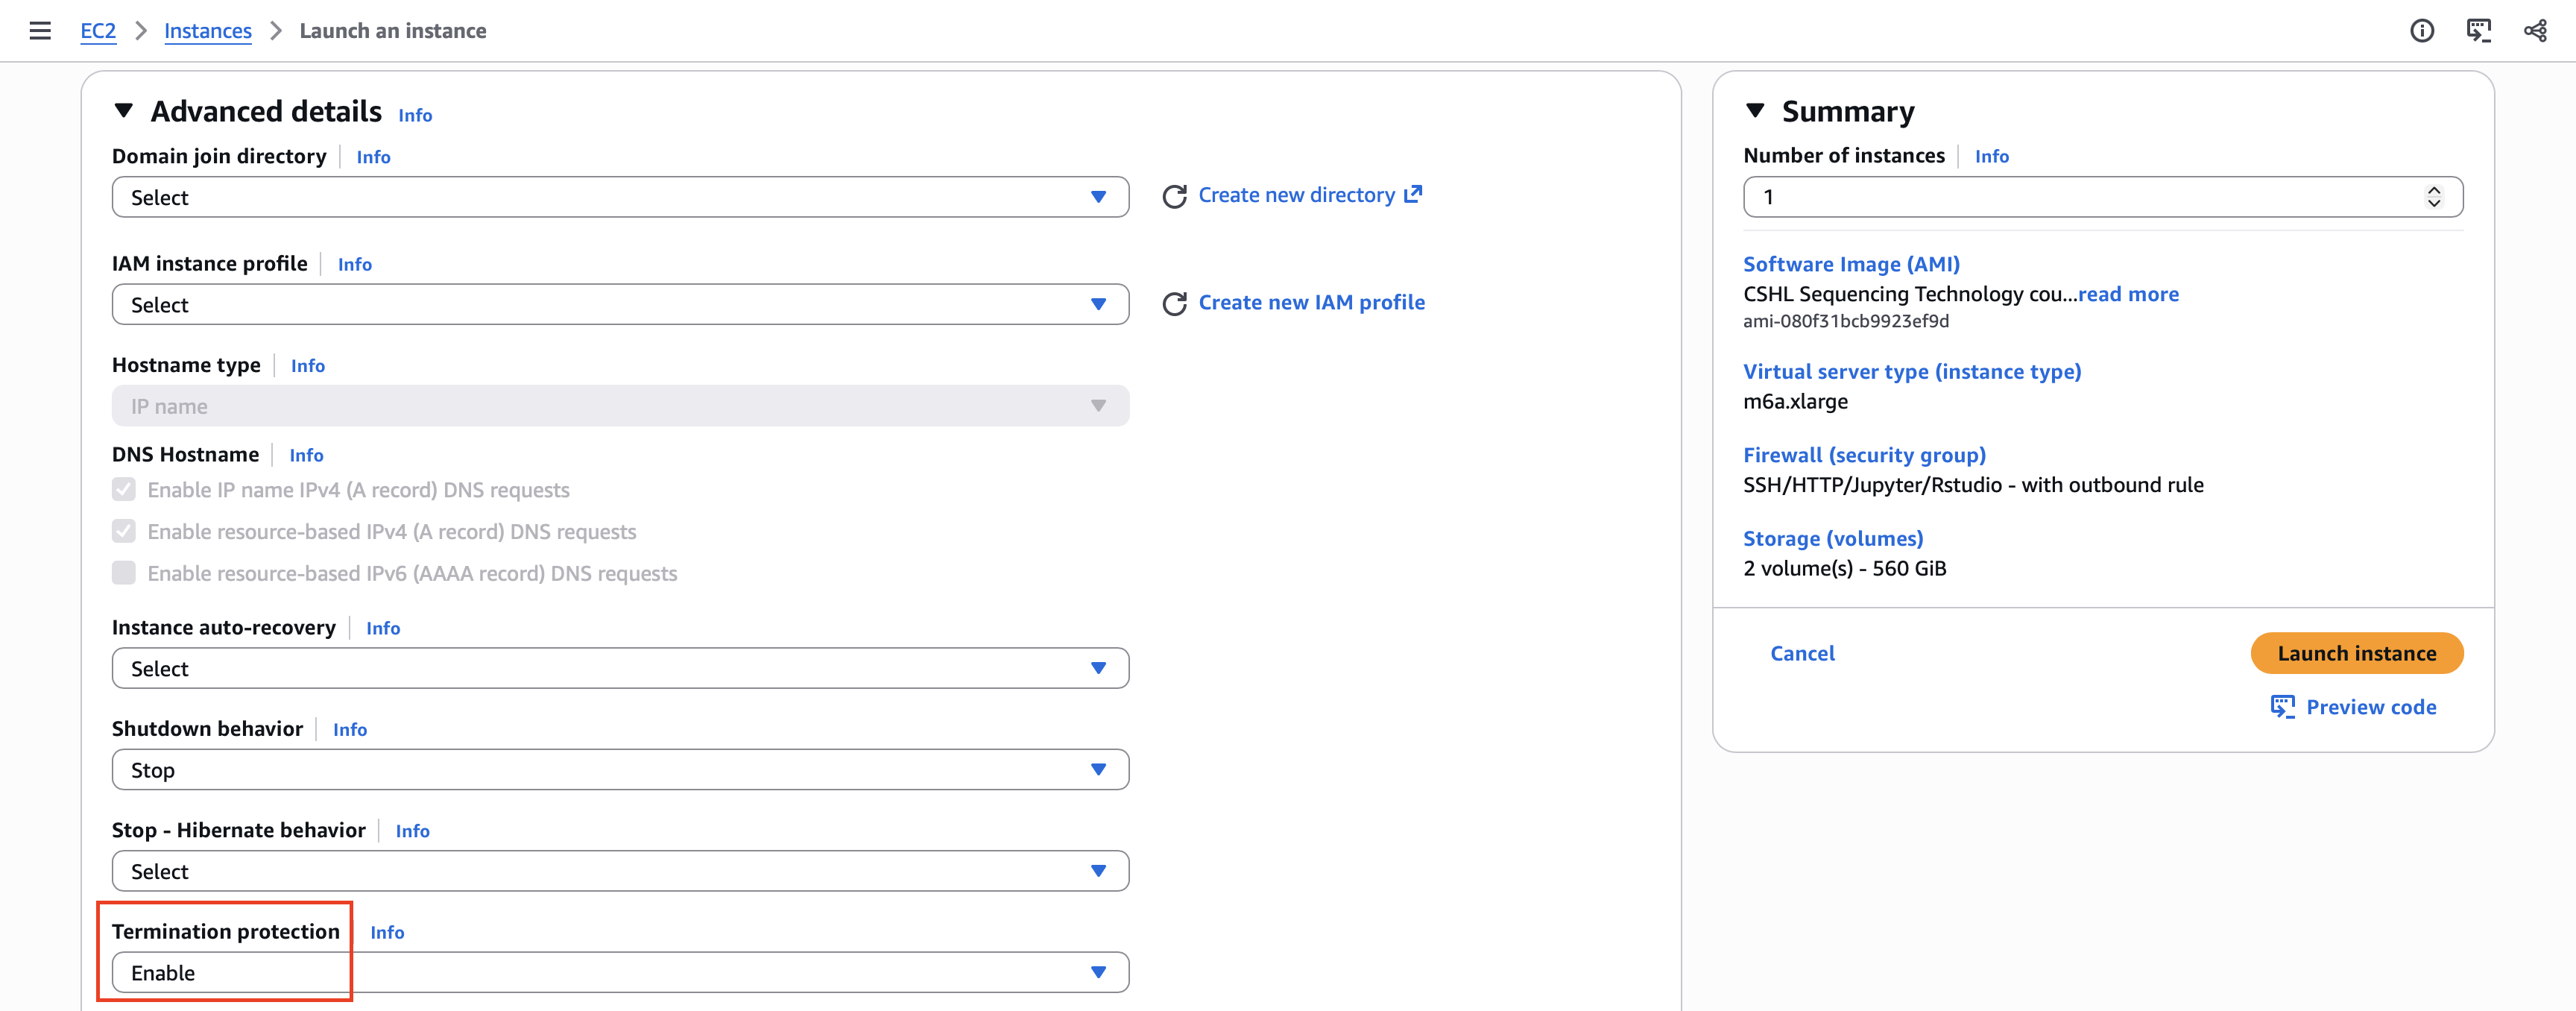
Select Launch instances.
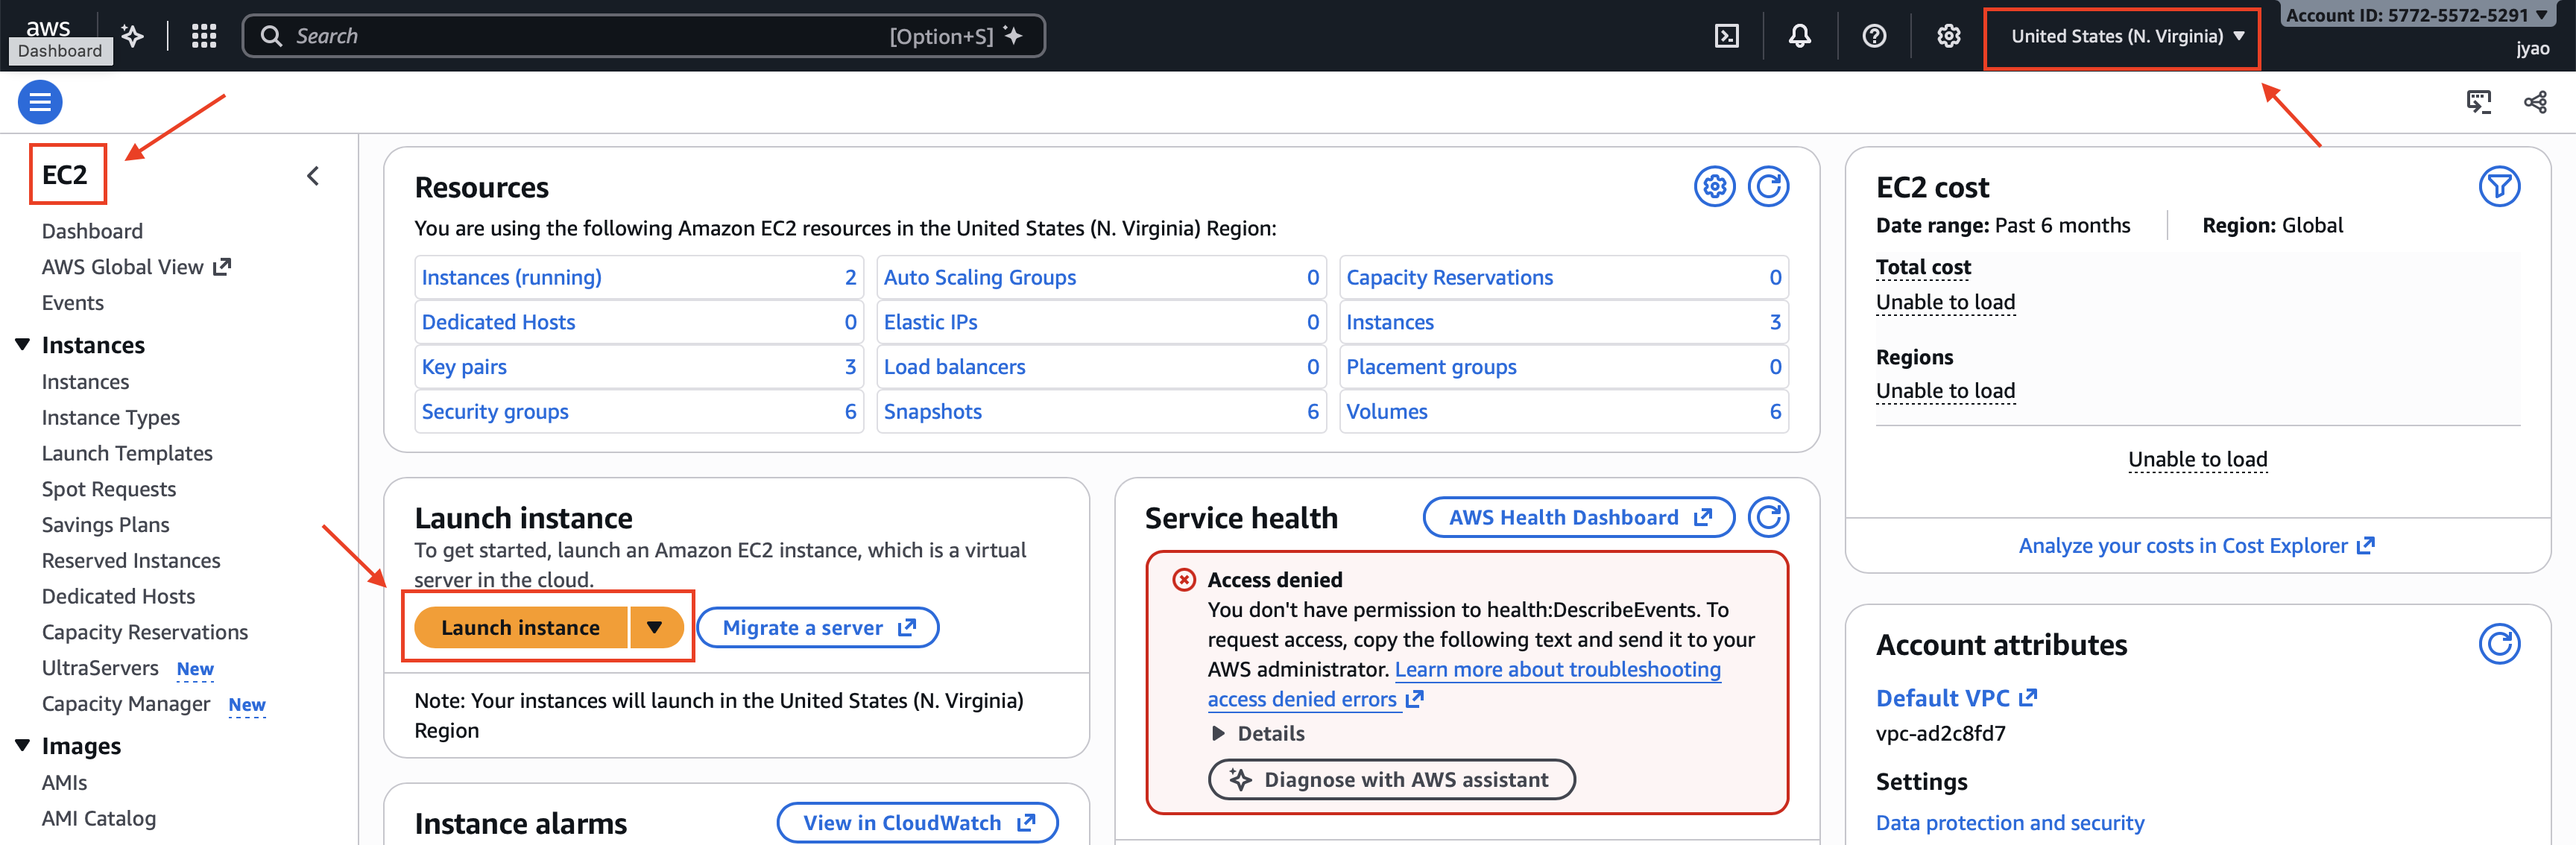
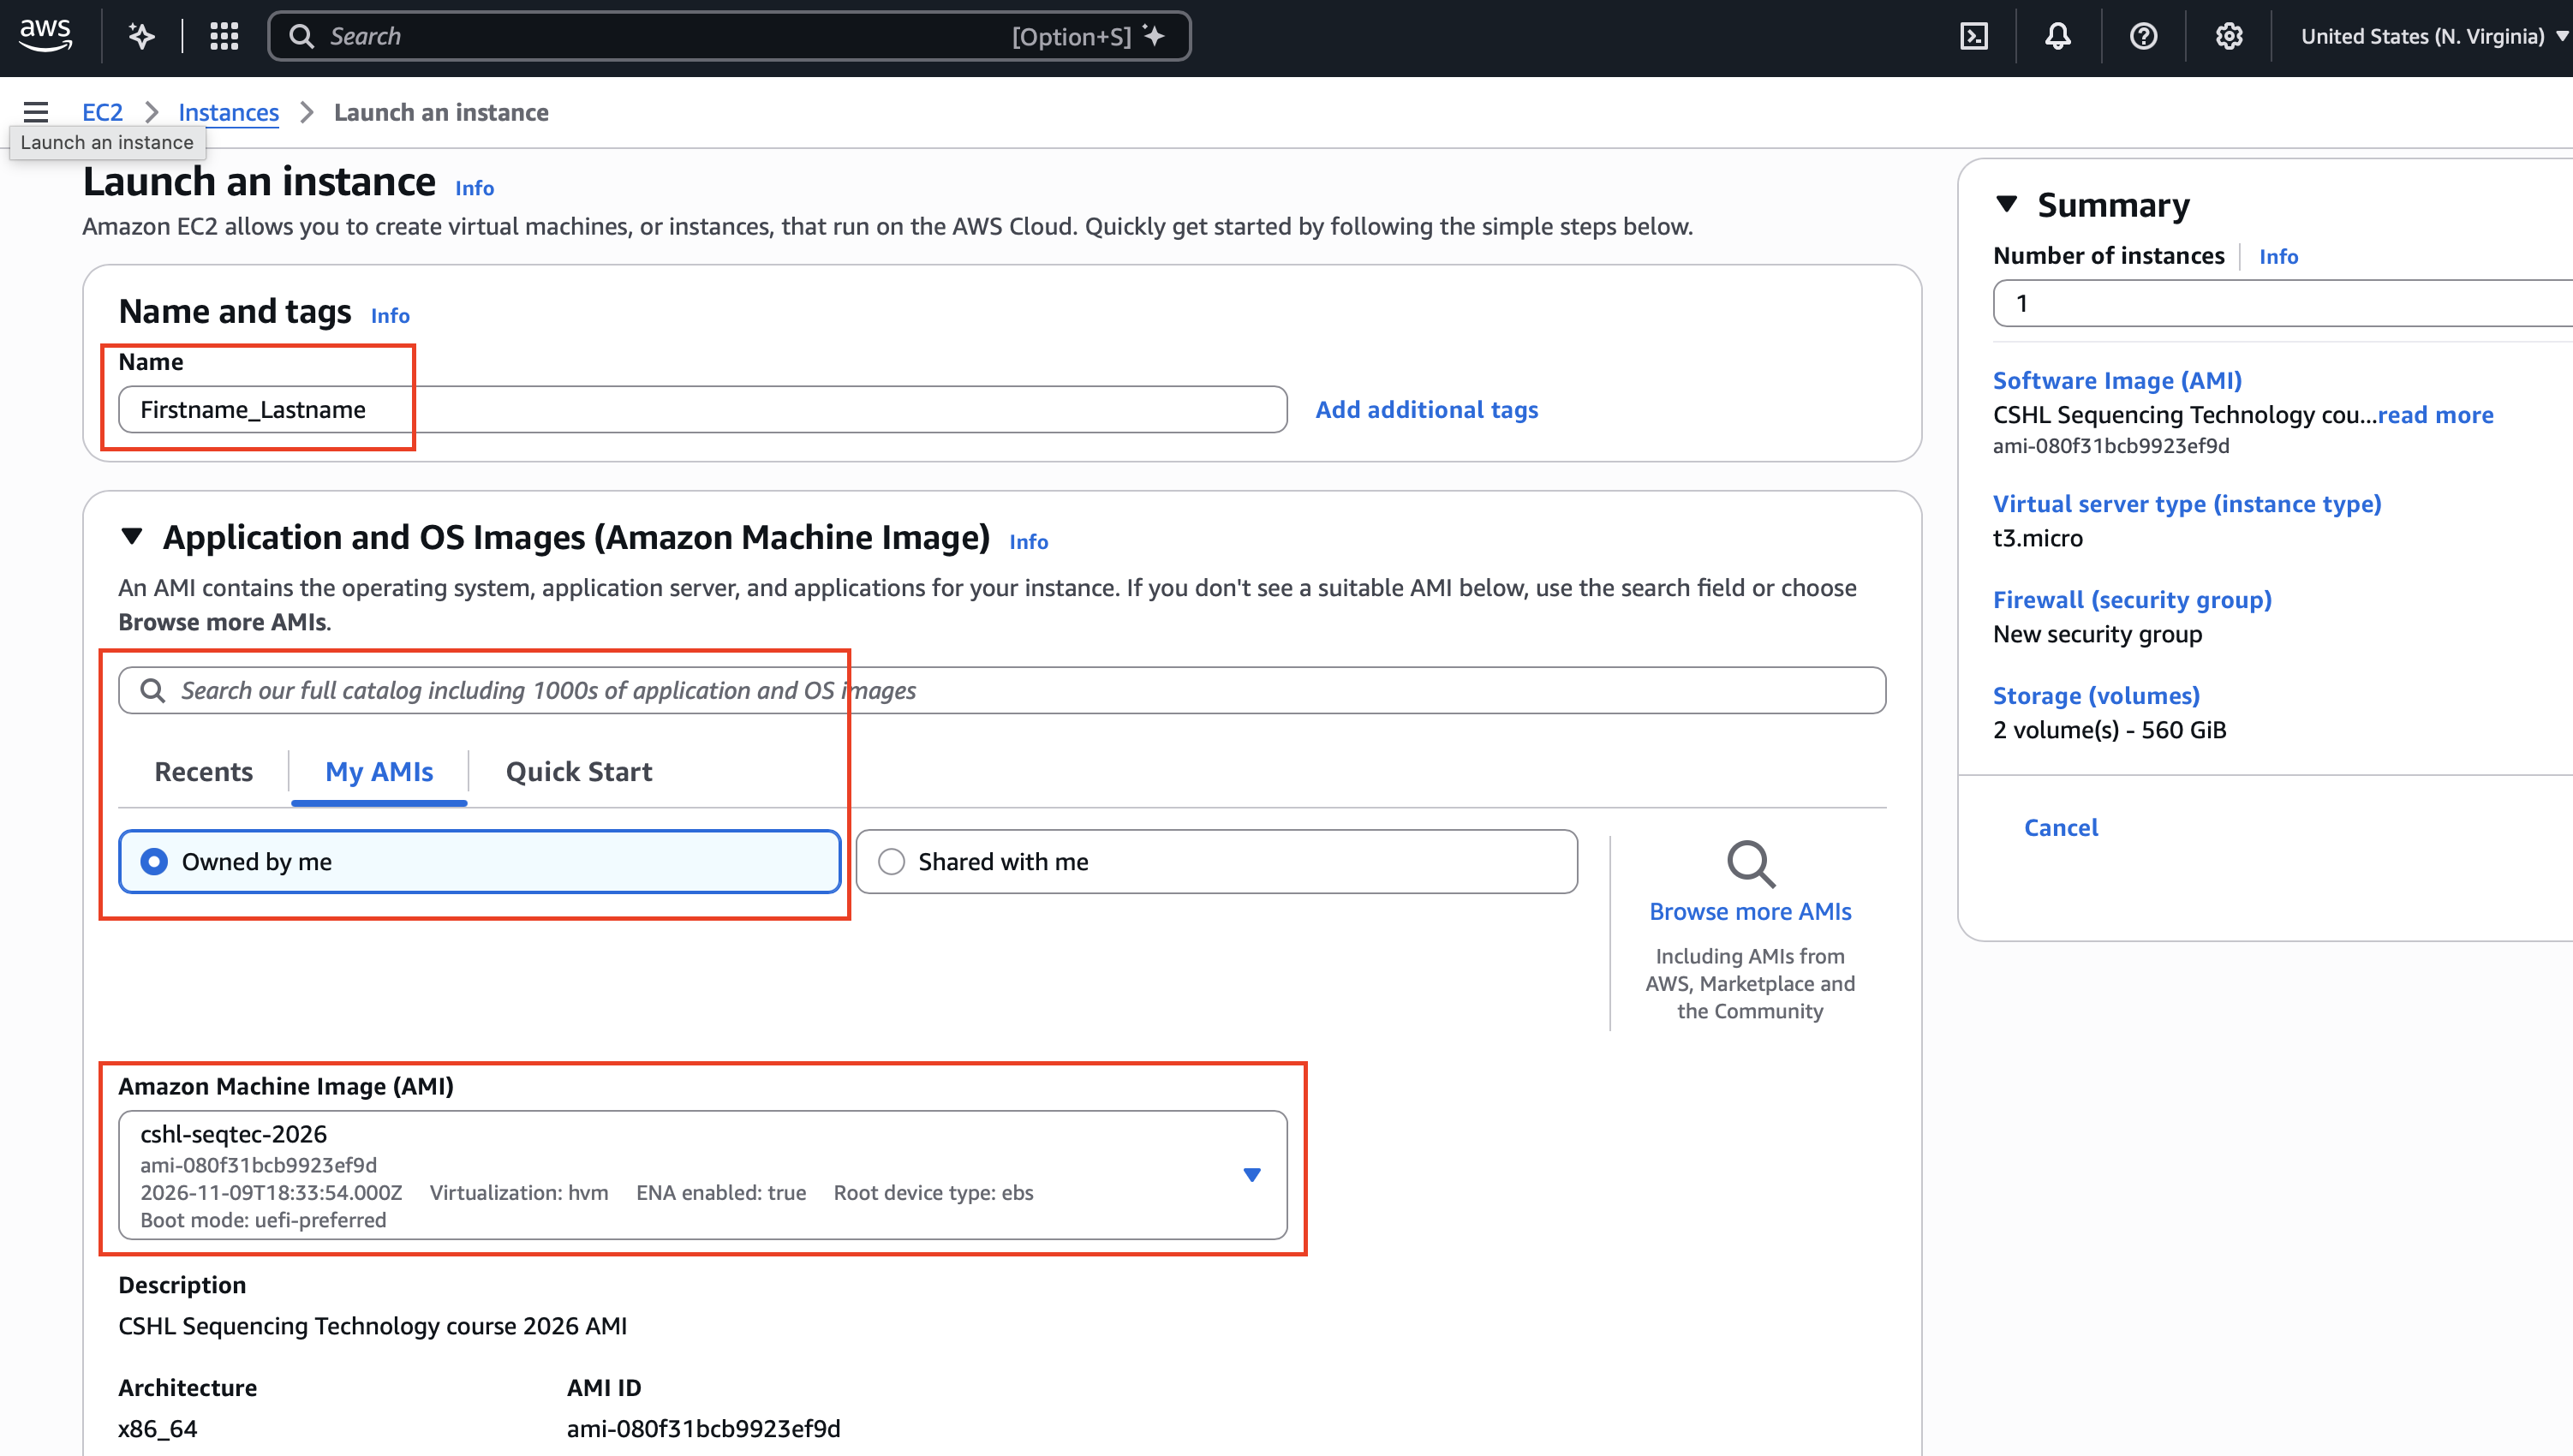
Firstname_Lastname.Application and OS Images (Amazon Machine Image): Under My AMIs, search for and select cshl-seqtec-2026.
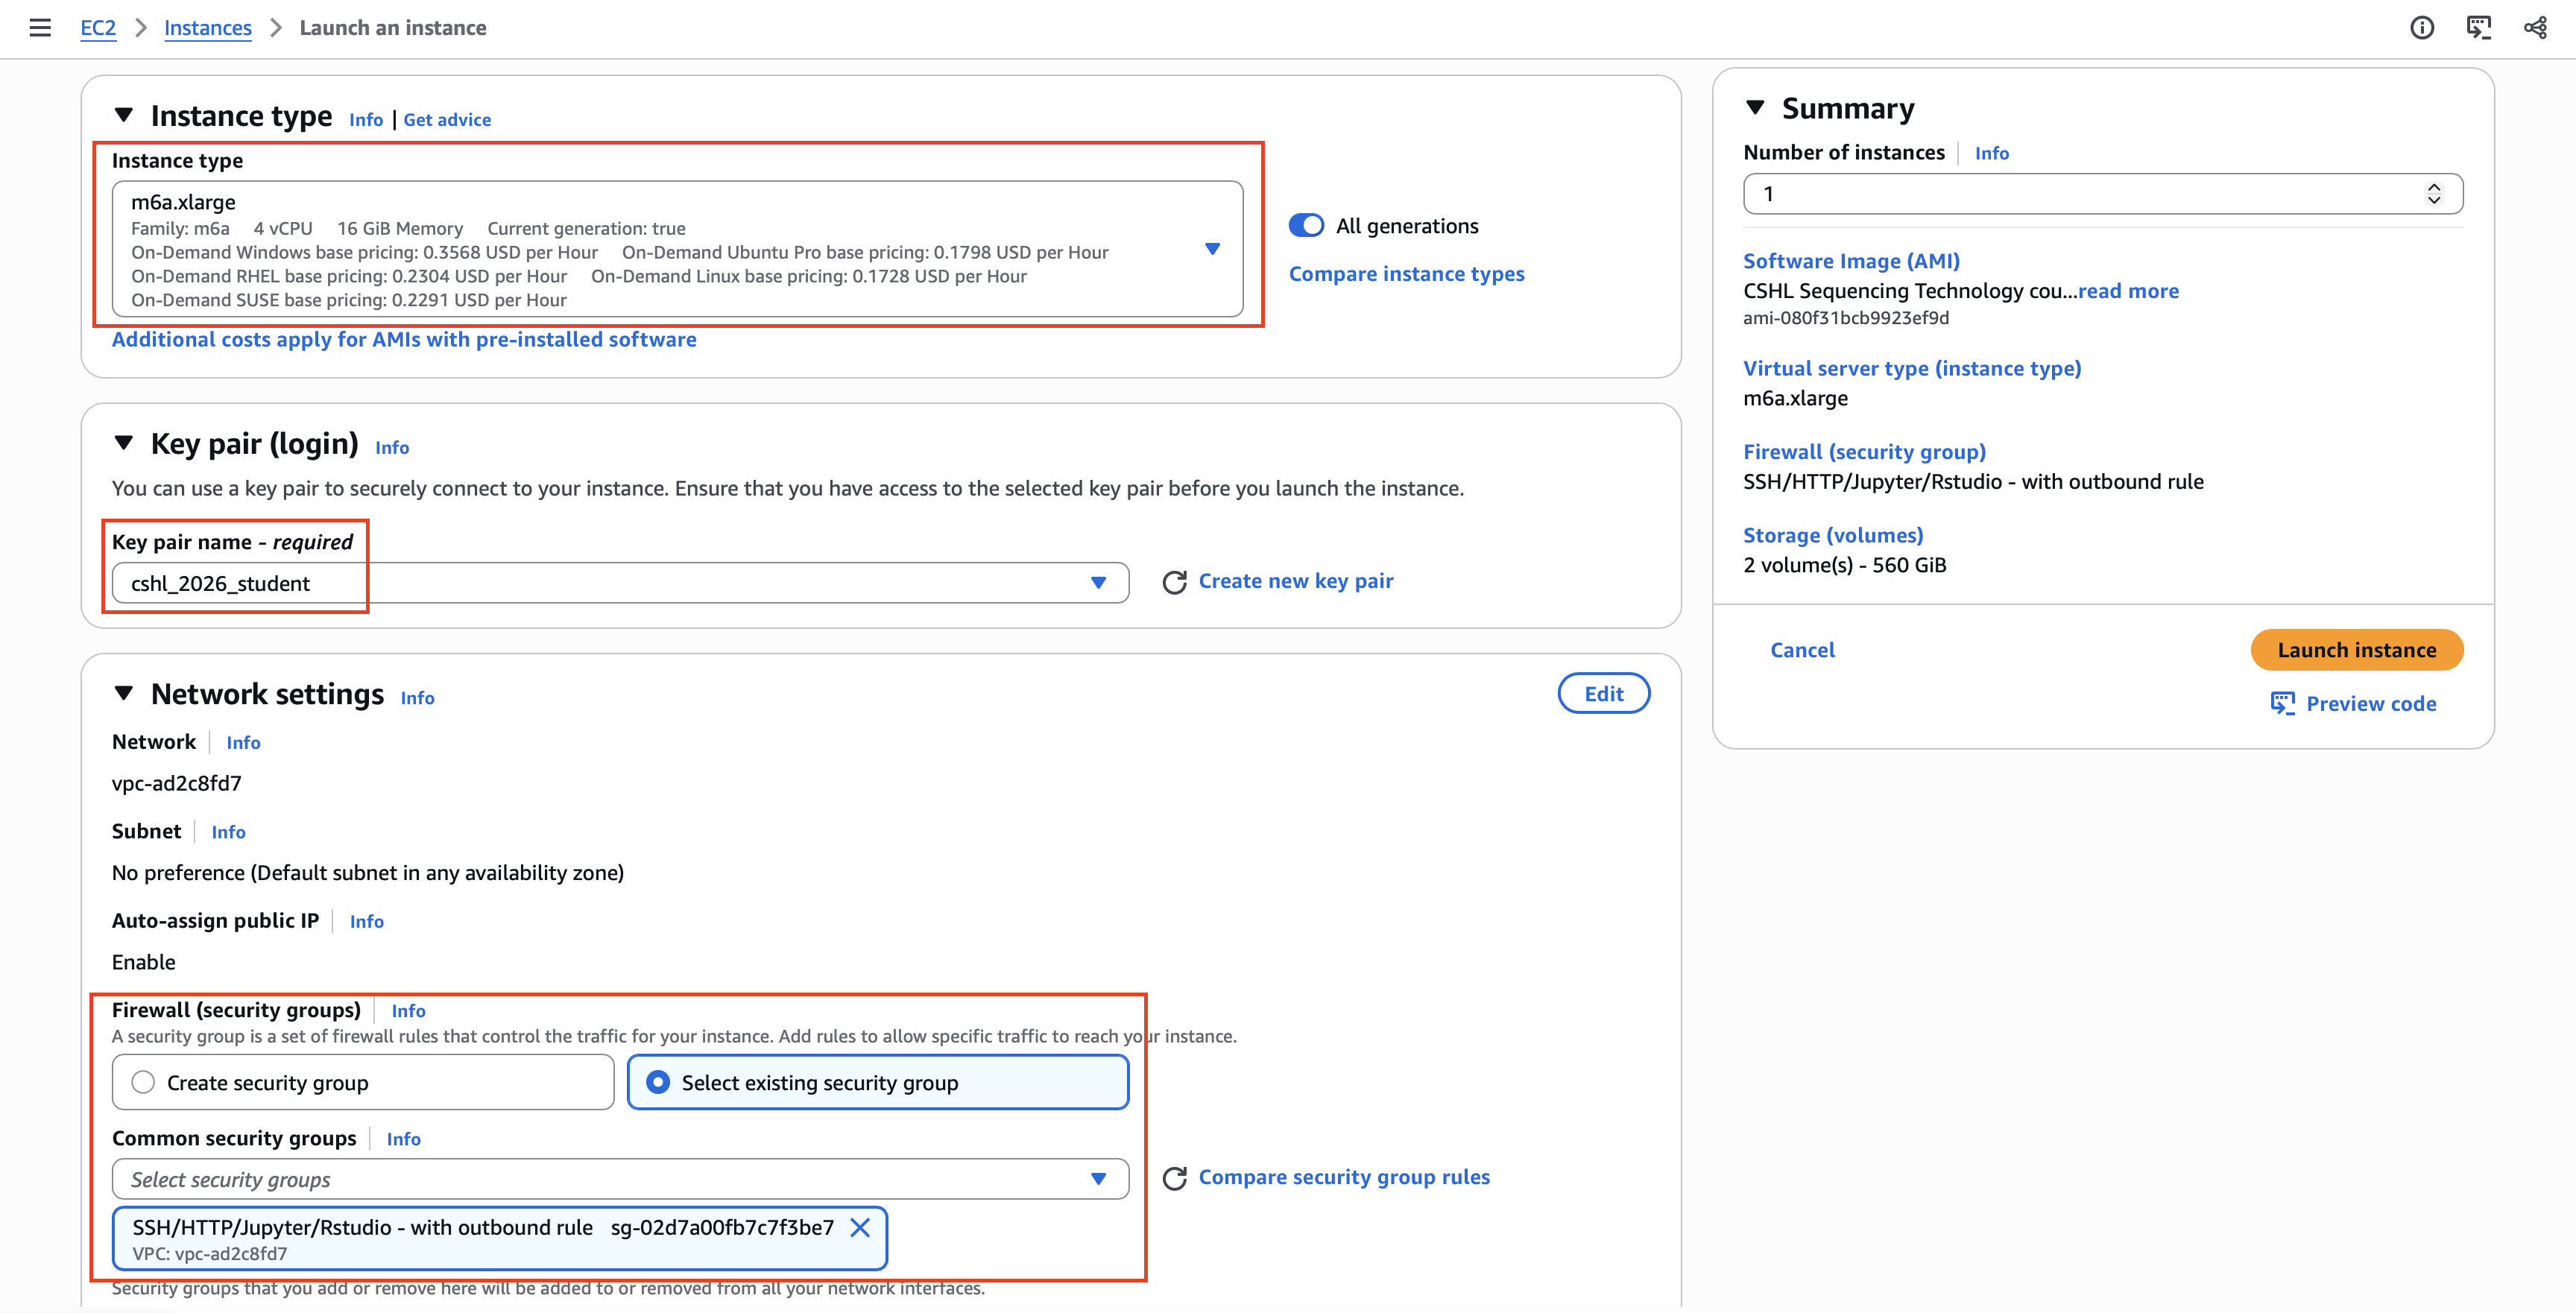
m6a.xlarge.cshl_2026_student, or create a new key pair and save the downloaded key file somewhere you can find it. You will need the matching private key file to log in.Network settings: Select the existing security group SSH/HTTP/Jupyter/Rstudio - with outbound rule, or create one with SSH and HTTP access.
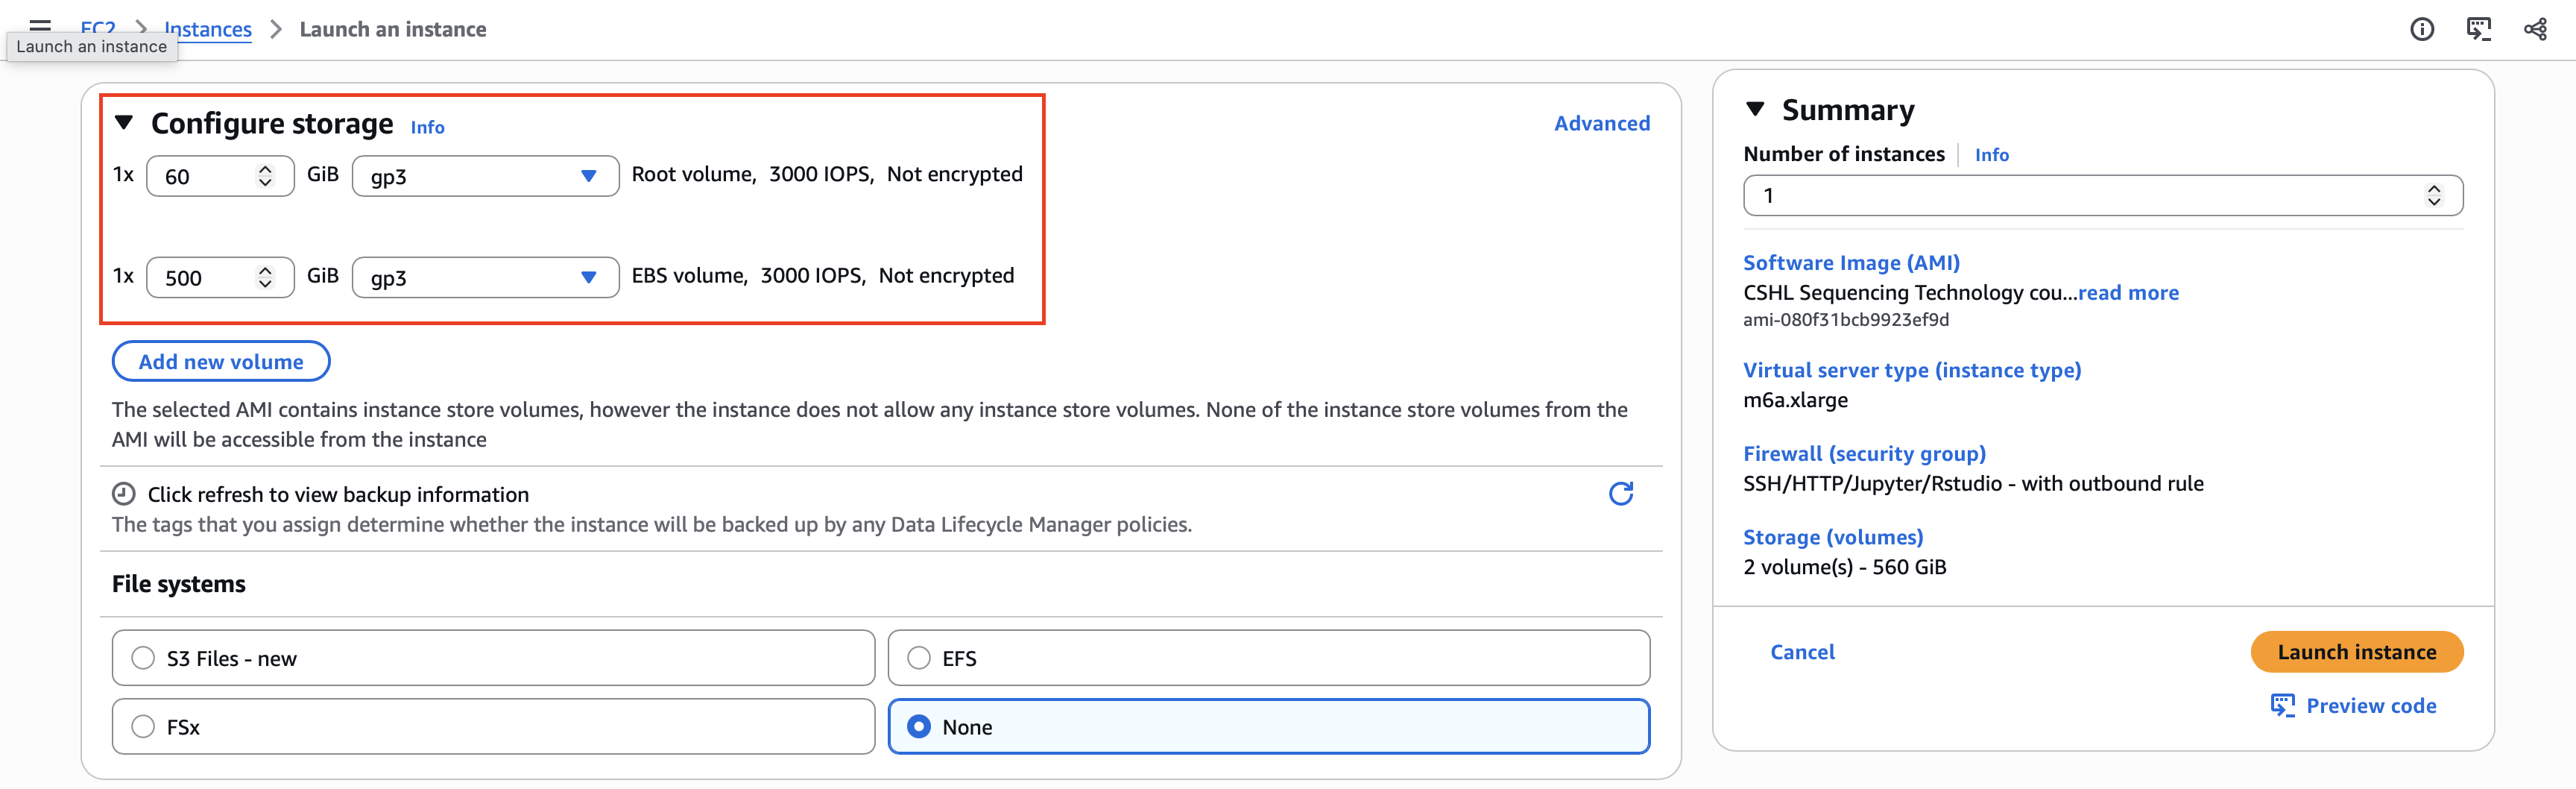
Configure storage: Confirm that two volumes are listed.
Advanced details: Enable Termination protection.
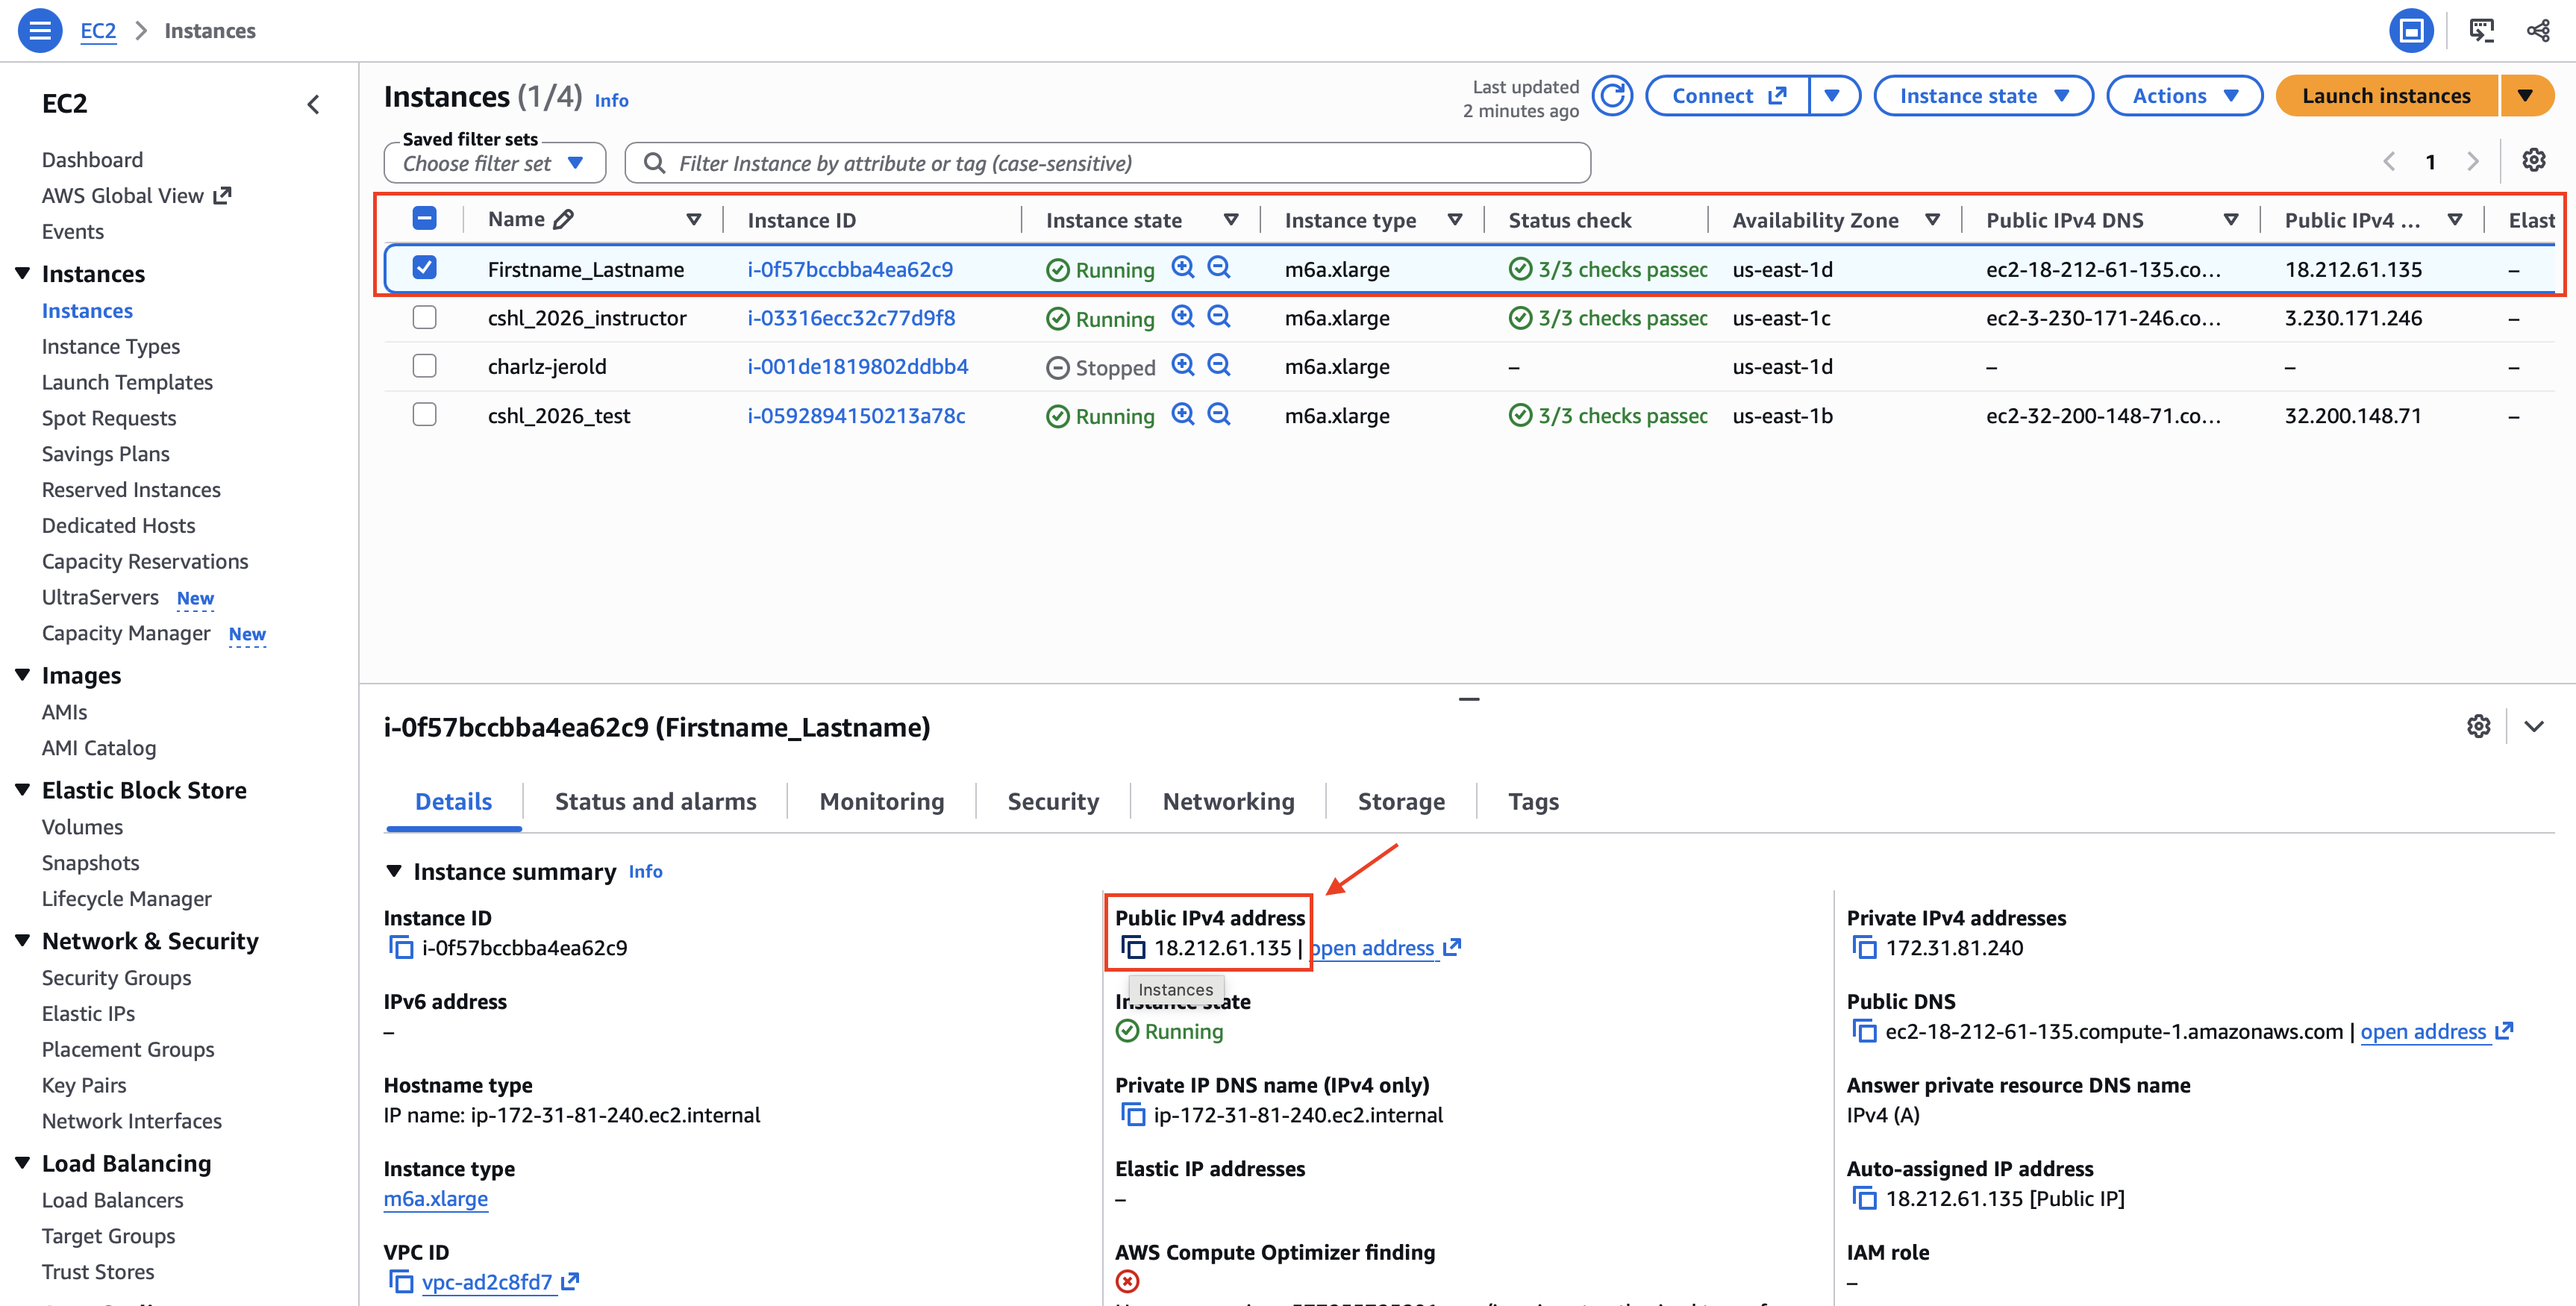
Select your instance, then choose Connect. On the EC2 Instance Connect tab, find and copy your Public IP address.
Before you connect, have the following ready:
cshl_2026_student.pem (or the key file matching the key pair you selected when launching your instance).ubuntu. This is the Linux user on the instance, separate from your AWS console user name.Connect only to your own instance. If two students use the same instance, they may overwrite each other’s files or interfere with each other’s work.
Choose the instructions for your computer:
Restrict access to your private key file:
chmod 400 "/path/to/cshl_2026_student.pem"
Connect to your instance using SSH:
ssh -i "/path/to/cshl_2026_student.pem" ubuntu@YOUR_PUBLIC_IP
Replace /path/to/cshl_2026_student.pem in both commands with the actual path to your downloaded key file. Replace YOUR_PUBLIC_IP with your instance’s public IP address or public DNS name.
For example, if your key is in the Downloads folder on a Mac:
chmod 400 "$HOME/Downloads/cshl_2026_student.pem"
ssh -i "$HOME/Downloads/cshl_2026_student.pem" ubuntu@YOUR_PUBLIC_IP
Here, -i specifies the private key file, ubuntu is the user on the instance, and the value after @ identifies the instance to connect to.
Choose one of the following tools to connect to your instance:
Open PowerShell and connect using the downloaded .pem key file:
ssh -i "C:\path\to\cshl_2026_student.pem" ubuntu@YOUR_PUBLIC_IP
Replace C:\path\to\cshl_2026_student.pem with the actual path to your key file and YOUR_PUBLIC_IP with your instance’s public IP address or public DNS name. The chmod step above applies to Mac/Linux only.
If PowerShell does not recognize ssh, install the Windows OpenSSH Client or use PuTTY as described below.
To configure PuTTy, start PuTTy and do the following:
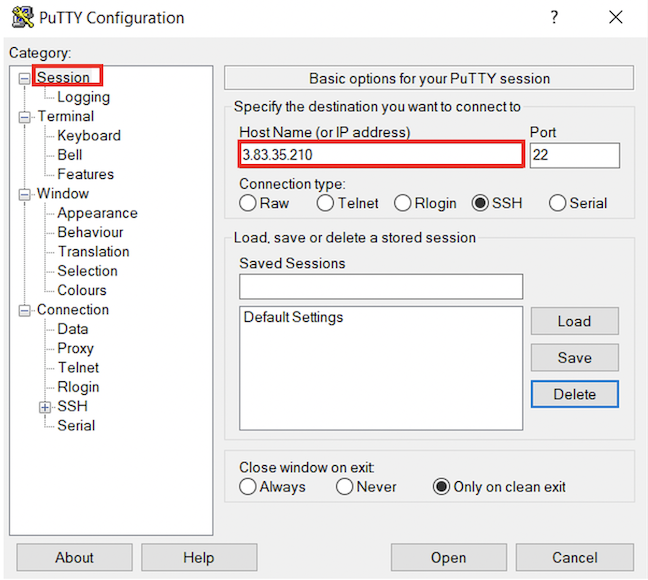
ubuntu.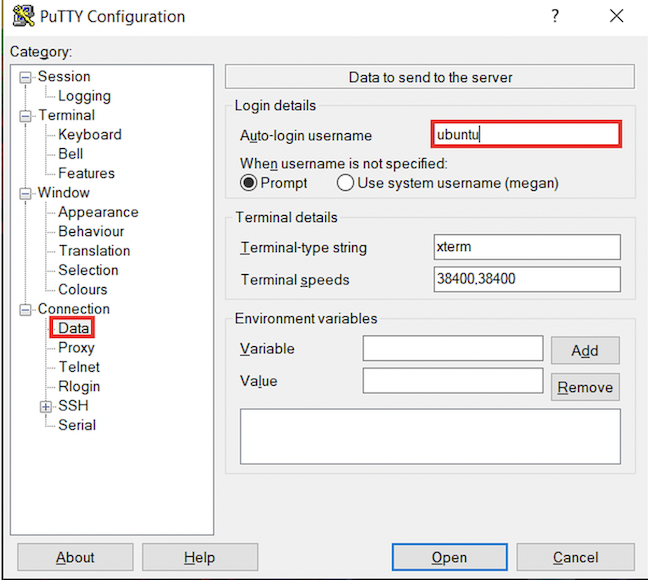
cshl_2026_student.ppk certificate that you downloaded above.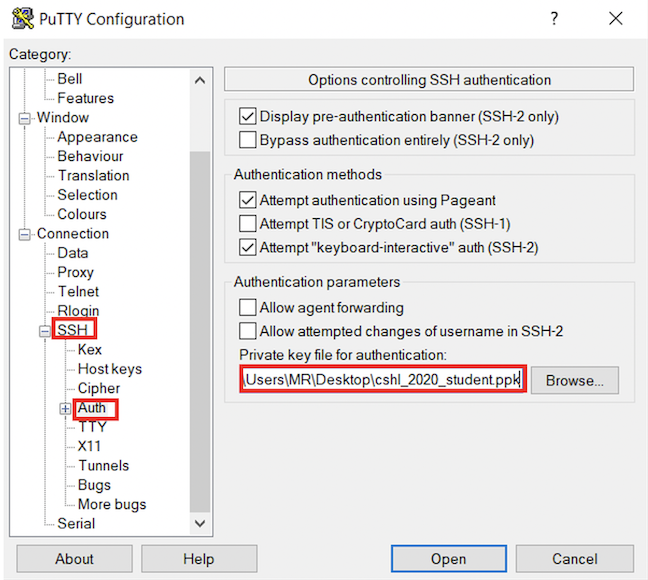
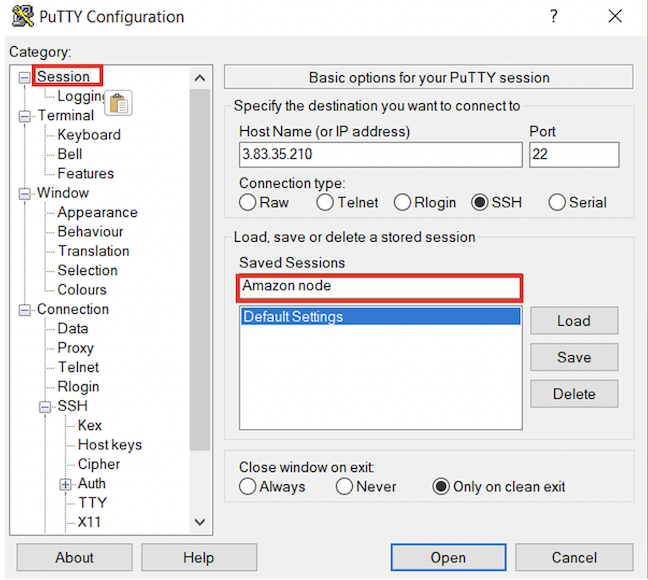
When you log in, you will notice that you have one directory already: “workspace”.
Choose the direction you want to transfer files:
scp -i cshl_2026_student.pem ubuntu@[your ip address or dns name]:nice_alignments.bam .
http://[your ip address]/ or https://[your dns name]
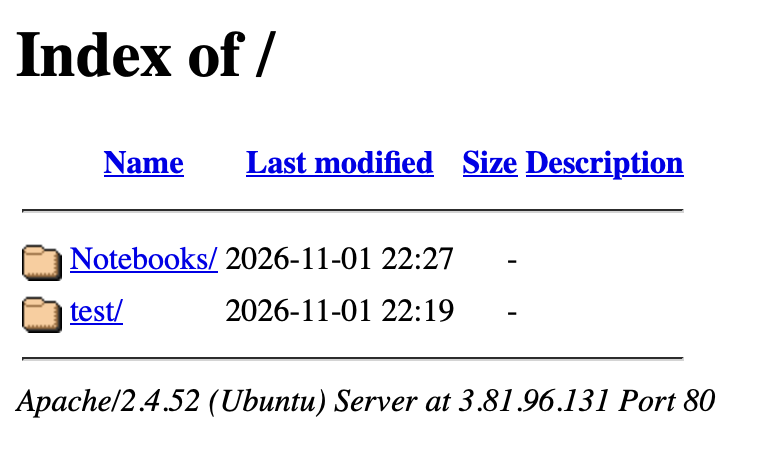
If you would like to upload your data to the AWS instance, use the example scp command below. Be sure to replace the variables below with the local path to your data, MY_DATA, and the amazon instance IP, YOUR_IP_ADDRESS.
scp -i cshl_2026_student.pem __MY_DATA__ ubuntu@[your ip address or dns name]:/
If you are trying to do this course on your own using the online materials only, of course an AWS EC2 instance has not been set up for you. If you have access to an AWS account though you can can start with the same Amazon AMI we use to create instances for each student. Currently this is:
Name: cshl-seqtec-2026 available in the US East, N. Virginia region (us-east-1).
We typically use an instance type of m6a.xlarge. For detailed instructions on how we created the AMI and configure each instance, please refer to the AWS Setup page.
Once you are logged into your EC2 instance using ssh, the following commands can be used to explore basic information about the machine
#How are storage volumes mounted?
lsblk

#How much storage space in being used for various mount points?
df -h

#Detailed description of hardware
lshw

#See active resource usage right now with "top".  Use "1" to see all CPUs individually.  Use "q" to exit
top
We have built a docker image with all necessary software tools installed to complete this course. This allows the hands-on exercises to be perfomed on your own desktop or laptop or anywhere that has docker installed. The following commands can be used to download and run this image as an interactive docker container.
First you will need to install docker. Typically this involves installing Docker Desktop. Once installed, start docker, and open a terminal application. Explanations of how to do this are detailed above in the Using AWS section. At the terminal you can test your docker installation is working/running with docker --help. Once you have docker working you can use the following commands to download, set up, and run the rnabio image.
docker pull griffithlab/rnaseq-toolkit:latest
mkdir -p /tmp/rnabio-workspace
docker run -it -p 127.0.0.1:8080:8080 -v /tmp/rnabio-workspace:/workspace griffithlab/rnaseq-toolkit:latest
Optionally, to enable Docker functionality within the container (for running other bioinformatics containers):
# Mount the Docker socket to enable host Docker engine access
docker run -it -p 127.0.0.1:8080:8080 -v /tmp/rnabio-workspace:/workspace -v /var/run/docker.sock:/var/run/docker.sock griffithlab/rnaseq-toolkit:latest
The docker session should now be ready for the Unix tutorial and practical exercises.